Saturday, June 26, 2010

Week 4: Dipped Lemon Spritz

Hmmm... being that it's 11:00 on a Saturday night and I'm finally posting this week's recipe, you're probably thinking that I'm starting to wimp out on the one year commitment. Not a chance. Once again, the baking was done on Wednesday, but I couldn't motivate myself to post it until now. Here ya go!

Dipped Lemon Spritz
Recipe from Taste of Home
Makes 6 dozen cookies

2/3 c. plus 2 Tbsp. sugar
2 tsp. grated lemon peel
1 c. unsalted butter, softened
1 egg
2 tsp. lemon juice
1 tsp. vanilla extract
2 1/2 c. all-purpose flour
1/4 tsp. baking powder
dash salt
1 pkg. (12 oz.) dark chocolate chips

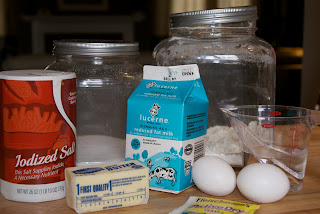
(Sorry, I forgot to take a picture of the ingredients this time.)

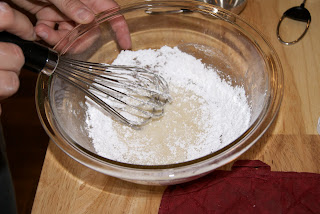
In a small food processor (doesn't really matter if it's small or not-- I used a big one), combine sugar and lemon peel; cover and process until blended.


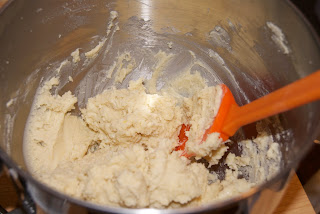
In a large bowl, cream butter and 2/3 c. lemon-sugar until light and fluffy. Beat in the egg, lemon juice and vanilla. Combine the flour, baking powder and salt; gradually add to creamed mixture and mix well.


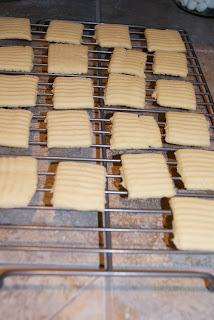
Using a cookie press fitted with a 1 1/2 inch bar disk, form dough into long strips on ungreased baking sheets. (I always use parchment paper or a silpat on the baking sheets, but neither is necessary for these cookies.) Cut each strip into squares-- there is no need to separate the pieces.


Bake at 350 degrees for 8-10 minutes or until set (don't brown the cookies). Remove to wire racks to cool completely.


The part where it says to cool completely? Yeah... make sure they're completely cooled before proceeding to the next step. This is important. Learn from my mistakes. I didn't wait until they were cooled, and I lost a few in the bowl of chocolate. They are super delicate while they are warm. Just a word to the wise.

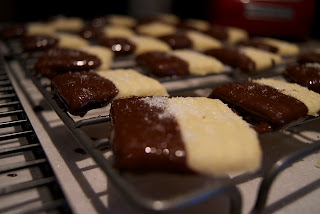
In a microwave, melt chocolate; stir until smooth. Dip cookies diagonally in chocolate, allowing excess to drip off. Place on waxed paper (or back on the wire cooling rack); sprinkle chocolate with remaining lemon sugar. Let stand until set. Store in an airtight container at room temperature, or freeze for up to 3 months.


Now it's time for honesty: I don't really care for these cookies. I've been told by my always willing taste testers (a.k.a. my family) that they're really good, and my niece wants me to share the recipe with her mom (my sister). In my humble opinion, there isn't enough citrus flavor to these cookies. If I were to make them again (and let's face it, that's not likely), I'd probably add more lemon zest to the sugar and a little more lemon juice to the dough. I like in-your-face lemon flavor, not just a subtle "do I detect a hint of lemon?" flavor. I'm just sayin'. Now I'm thinking about changing things up and going with an orange variation. I love a good orange and chocolate combo.

What are your favorite flavor combinations?

Saturday, June 19, 2010

Week 3: Granola bars


I'll bet you all thought I was going to forget to post this week. Ha! I actually got the baking done on Wednesday, but haven't had a spare minute to update the blog until today. So you see, I am NOT failing or procrastinating... I'm busy. :)

I love granola bars. Love them. My favorite is Maple Brown Sugar from Nature Valley. They're sweet and crunchy and yummy. They're also expensive. I can get them on sale for $3.50 a box, if I'm lucky. There's got to be a better way, right? You betcha. Here we go... homemade granola bars! :)

Granola Bars
Makes a 9x13 pan

2 c. quick cooking oats
1 c. all-purpose flour
3/4 c. packed brown sugar (I used 1/4 c.)
3/4 c. mini chocolate chips
1/2 c. wheat germ
1/2 tsp. salt
1/2 c. vegetable oil
1/2 c. honey
1 egg
2 tsp. vanilla extract


Combine oats, flour, brown sugar, chocolate chips and salt in a bowl. Make sure you beat all the lumps out of the brown sugar.


If you'd like to make cinnamon raisin bars, you can substitute 3/4 c. raisins for the chocolate chips, and add 1/2 tsp. ground cinnamon to the dry ingredients. Oh, and you can substitute whole wheat flour for the all-purpose flour (that's for you, Kristin!).

Combine egg, oil and honey in a small bowl. Whisk it like crazy until everything is combined.

My lovely assistant, Ashleigh, is quite proficient as whisking. Notice the concentration on her face. Making granola bars is serious business. :)

Add the wet ingredients into the dry ingredients and mix it all up.

Pour the whole mess into a greased 9x13 inch pan. Using a greased spatula or wet spoon, spread it into an even layer. You may think there isn't enough to fill the pan, but don't fret-- it'll spread all the way out. Just be patient and keep working at it.


Bake at 350 degrees for 15-18 minutes, or until lightly browned around the edges (it took the full 18 minutes in my oven). Completely cool pan on a wire rack. When it's all cooled, cut into whatever size bars you like.


We didn't even cover the bars after cutting them. They are nice and moist, and honey is a pretty good preservative. I'm not sure how long they'd keep without being in a covered container, as we ate the entire pan in 3 days.

These are more like cookie bars than crunchy granola bars. I'd compare them to the Quaker chewy granola bars you can buy in the store. I'm looking forward to trying out different combinations of dried fruits and nuts. Let me know what works for you!

Wednesday, June 9, 2010

Week 2 (part 2): Swedish Tea Ring

Okay, people... here we have the official baked product for the week. For the past two years, Sailor Boy has been telling me about this amazing, wonderful, sweet, sticky baked slice of goodness that he grew up eating at the family Christmas gathering. In fact, I'd heard so much about it that I was concerned that anything I made would never measure up to the standard set by his Grandma. From what I understand, she's set the bar pretty high. This explains the minor anxiety attack I experienced at merely reading the recipe. Deep breath... and... GO!


Swedish Tea Ring
From Grandma Spencer
Makes 2 rings

2 pkg. yeast
1/2 c. warm water (approx. 100 degrees)
1 c. milk
1/2 c. butter, softened
1/2 c. sugar
2 eggs, beaten
4 1/2 c. flour
1 tsp. salt
cinnamon
brown sugar
extra butter

Combine yeast and water in small bowl; set aside. Scald milk (don't know how? Go here), then pour milk into a large bowl. Add butter, sugar, and salt.
When butter is melted, add the eggs and yeast/water mixture. Slowly add in 4 cups of flour (I used the paddle attachment on the kitchen-aid mixer for the first 2 cups, then switched to the dough hook for 2 more cups).
Turn the dough out onto a floured surface (I used the other 1/2 cup of flour called for in the recipe) and knead for approximately 10 minutes, until the dough becomes stiff. The dough will be quite sticky at first-- feel free to use a little more flour to "unstick" it from the counter if you need to. Lightly butter a large bowl, and place the dough ball into the bowl, turning it once so the dough is coated with butter (this is not a low cholesterol recipe).
Cover the bowl tightly with plastic wrap, and let it rise for 30-45 minutes in a warm place.
**Here's my tip for rising: put a coffee cup filled with water in the microwave. Nuke it for 2 minutes, then leave it in the microwave for a couple more minutes to build up some steam/condensation. Remove the coffee cup and put your bowl of dough in the micro. This gives it a warm, draft-free place to groove.
Divide dough into 2 equal portions. Roll each portion out separately on a floured surface, to a rectangle-ish shape measuring about 15x12 inches. It does not, I repeat does not need to be a perfect rectangle. It's just a general shape/size recommendation.


Here's where it gets really good: Brush the dough with melted butter. Sailor Boy says Grandma was VERY generous with the butter. Who am I to argue? (Remember, I warned you that this isn't the time to worry about your cholesterol.) After it's sufficiently coated, sprinkle brown sugar and cinnamon on the dough (you can also add walnuts or raisins if you like). The recipe I have says 1 tsp. cinnamon and 3 Tbsp. brown sugar. Personally, I didn't measure. I kept sprinkling until Sailor Boy said "stop". Hey, he's the expert.


Starting at a long side of the rectangle, roll the dough up as tightly as possible.

Place seam-side down on a baking sheet (I brushed a little more butter on the baking sheet before I put the roll on it-- hey, why not add more butter?!). Sailor Boy says that Grandma used to leave it straight, but my roll was too big, so one ended up looking like a caterpillar, while the other got shaped into a circle. Hello? It's called Swedish Tea RING... rings are circular! Now, use your kitchen scissors to cut slits into the top of the roll, about 3/4 of the thickness of the roll (the slits should be approx. 3/4 of an inch apart as well). After each cut, use the blades of the scissors to fold/lean the dough over until you can see the inside of the roll. I know it sounds complicated-- hang in there! Soooo worth it.


Bake at 350 degrees for 25 minutes or until brown. Oh yeah, if you haven't gotten enough butter yet, you can brush a little more on top of the rolls before baking, then sprinkle a little more cinnamon on top. Just a suggestion. :)

When they come out of the oven, you'll want to pour some yummy glaze on top. Here's a simple recipe:

Powdered Sugar Glaze
(Double the recipe to make enough for 2 rings-- I'm putting a single recipe here)


1 Tbsp. butter (of course!)
1 c. powdered sugar
1/2 tsp. vanilla
2 Tbsp. milk (or orange juice)
Put butter in 2 cup glass measuring cup. Cook on high for 30 seconds or until melted. Add all ingredients. Whisk together. Drizzle over tea rings.
(The recipe on cooks.com says to drizzle over cooled cake-- I say do it while it's warm)


Alright, that's it! I know... super long recipe. Trust me when I tell you that it's so worth it. Our kitchen smelled like delicious cinnamon sugar doughnuts. I'm so proud to be carrying on a tradition that means so much to Sailor Boy. Grandma is 93 years old now and isn't able to make this dessert anymore, but I know she'd make it for Sailor Boy if she could. Here's what she (and Grandpa) looked like in 1938. I love the sassy looks on both their faces.

What's that? You want one more look at the finished product? Okay, here ya go... enjoy!

Sunday, June 6, 2010

Week 2 (part 1): English Muffins


First, a disclaimer: English muffins are not baked.

I know! I totally thought they were! Apparently I didn't read the recipe thoroughly before I decided to go ahead with this "baking" endeavor. I decided to go for it anyway, and they did not disappoint. I'm looking forward to modifying this recipe to make cinnamon raisin muffins, but for now, I give you English muffins.

The recipe begins with a simple yeast dough... mix, knead, rise, roll out, cut into circles. I used a water glass rather than a cookie cutter to get them big enough. Place onto a pan of cornmeal, sprinkle more cornmeal on top, and let them rise again.

You will be totally shocked when you do the first flip. They seriously look like the English muffins you buy at the store. Only better. I even squealed and called Sailor Boy into the kitchen to join in my excitement. He was appropriately excited with me. One of the many reasons why I like him so much. :)


English Muffins
Makes approx. 20 muffins

1 1/4 c. warm water (110 degrees)
4 c. bread flour (I found that 3 1/4 c. was plenty)
2 1/2 tsp. instant yeast
1/2 tsp. baking soda
1 1/2 tsp. salt
2 small egg whites
fine cornmeal

Pour water into a large bowl. Add yeast, baking soda, and 2 cups of the flour; mix until smooth.
Allow to sit for 5 minutes uncovered. In the meantime, add egg whites into a separate bowl and beat with an electric mixer, until the egg whites have formed stiff peaks; add to dough batter.

Using a rubber spatula, fold in egg whites until incorporated into the batter. Add in the rest of the flour, 1/4 cup at a time, mixing with the spatula. After adding the first 1/4 cup of flour, add the salt.

Pour out onto a lightly floured surface when dough becomes too hard to mix in the bowl. Knead for 5-6 minutes until it becomes smooth and silky. Add a little vegetable oil to a clean bowl and place the dough in the bowl, turning once to lightly coat dough ball. Cover with plastic wrap and allow to rest until double in size, about 1 hour. Afterwards, pour out onto a flat surface. Press to release some of the air from the dough. Using a rolling pin, roll out to 1/2 inch thick. Allow dough to rest for 3 minutes to relax.

Use a 3 inch cookie cutter to cut circles from the dough. Place the cut out pieces onto some cornmeal. When you have leftover dough, just gather together and cut out more circles. Sprinkle the tops with more cornmeal. Cover with plastic wrap and allow to rest for 45 minutes.

About 5 minutes before you are ready to cook the English muffins, turn on your griddle or fry pan to 350 degrees (or medium heat). Spray with a little nonstick spray, and when the griddle is hot, place the muffins on and fry. If you are using a fry pan, you may only be able to fry 3-4 at a time. Fry on one side for about 4 minutes. Then turn over and fry for another 4 minutes. Do this once more to a total of 16 minutes. Cool on wire racks.

Wanna see how good they are? Check it out:

So. Good.